How to Create a Coaching Listing
3.
5. Add your availability
1. First set the session length for your lessons. If you want to offer lessons with different lengths, you should create one listing for each length so that you have 30 minute lesson, 45 minute lesson, etc.
2. To add your availability, first select “quick fill mode” below the calendar. You can then either select each of the days off of the calendar you want to add this schedule to or you can click “select all of the current month” and itll allow you to apply your availability to every single day. You can also use this to select every day of the month and then unselect the days you dont want to be available. Once you have the days selected, click the blue “fill selected days button” so that you can add the times you want to be available. You will need to be sure to set your lesson length here under the “appointment duration” length as well as how much buffer time you want between each lesson. This can be set as low as zero minutes and determines which times are shown available for clients to book.
1. For example let’s say you want to be made available every Mon-Fri for the month. Itll be fastest for you to click “select all of September” and then unselect all of the Saturdays and Sundays rather than select every weekday.
Building something people want
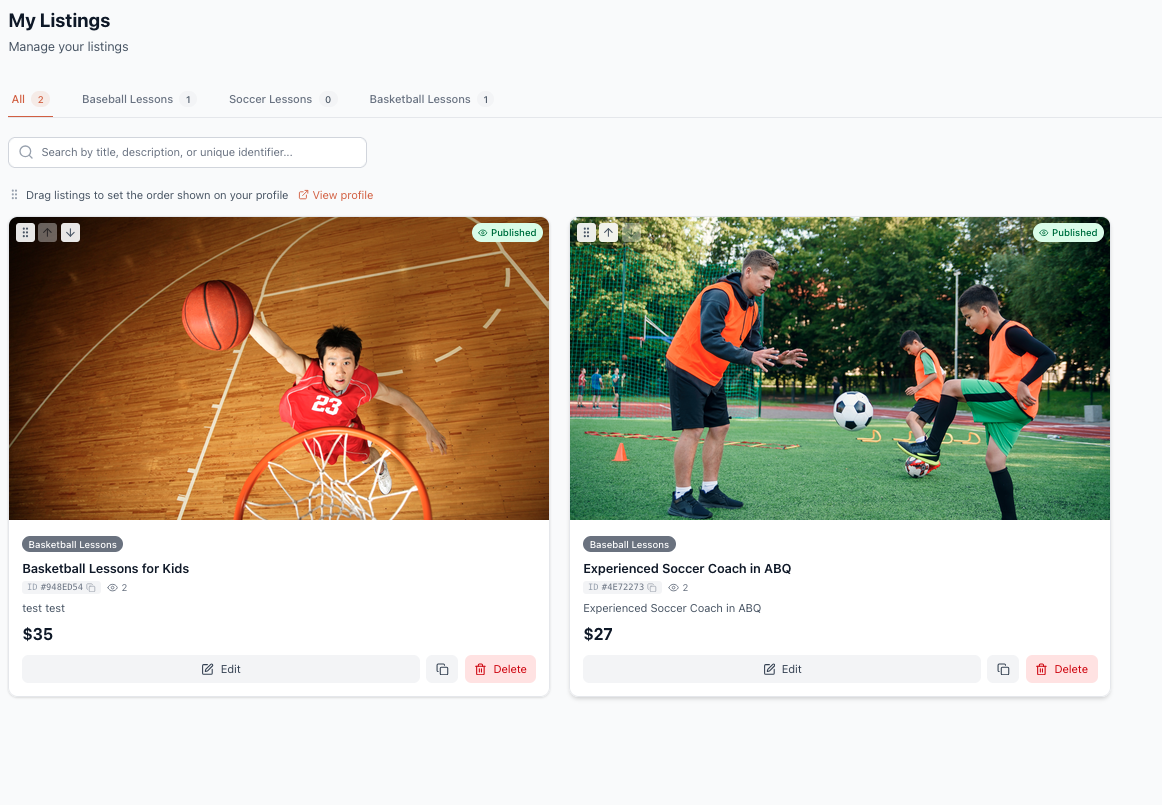
Go to "My Listings" and click the orange add listing button.
Building something people want
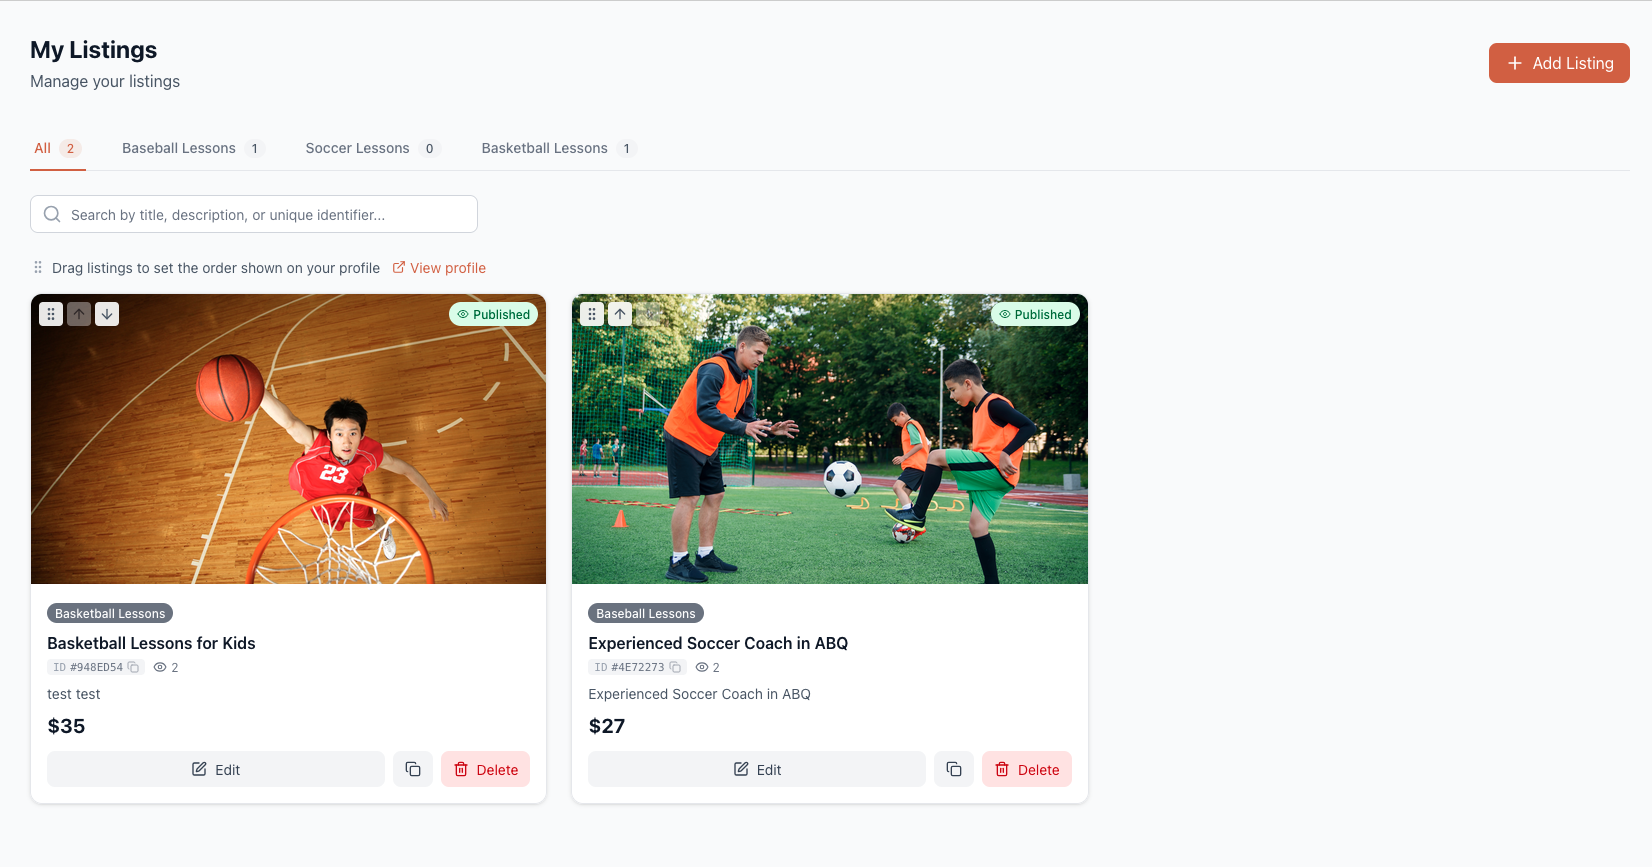
Add the following info:
1. The sport
2. A title and description for your listing. This should include relevant info that showcases to parents your specialities, skills, experience etc.
3. Your per session price. Each listing has to be of only one length. If you want to create sessions with different durations, prices, etc you will need to create multiple listings.
4. Add any relevant and appropriate photos or videos
5. Add the address for the location you will meet the family for the session. This can change based on the requests of a parent etc but a default location needs to be added to the listing.
6. Read the section below on how to add your availability to a listing.
Note: A listing will not be available for search on the website unless there is future availability.
7. Ensure that the publish immediately box is selected in order to publish your listing. Leaving it unselected will save your listing as a draft only.
About Our Company
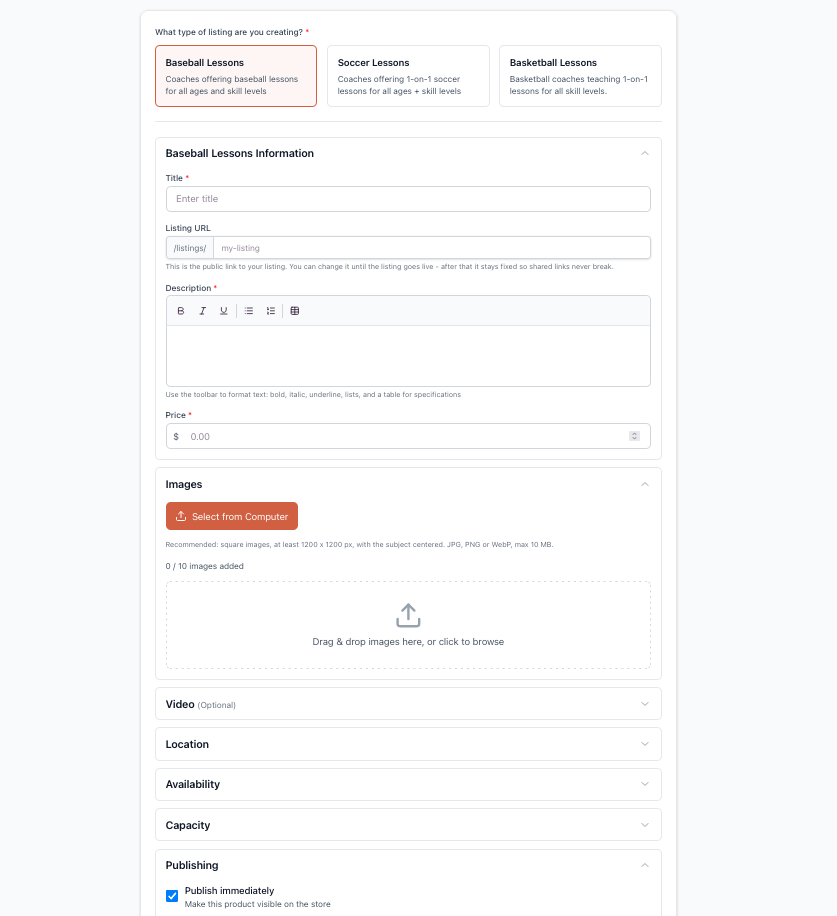
Add your availability
1. First set the session length for your lessons. If you want to offer lessons with different lengths, you should create one listing for each length so that you have 30 minute lesson, 45 minute lesson, etc.
2. To add your availability, first select “quick fill mode” below the calendar. You can then either select each of the days off of the calendar you want to add this schedule to or you can click “select all of the current month” and itll allow you to apply your availability to every single day. You can also use this to select every day of the month and then unselect the days you dont want to be available. Once you have the days selected, click the blue “fill selected days button” so that you can add the times you want to be available. You will need to be sure to set your lesson length here under the “appointment duration” length as well as how much buffer time you want between each lesson. This can be set as low as zero minutes and determines which times are shown available for clients to book.
For example let’s say you want to be made available every Mon-Fri for the month. Itll be fastest for you to click “select all of September” and then unselect all of the Saturdays and Sundays rather than select every weekday.
Our Story in Pictures
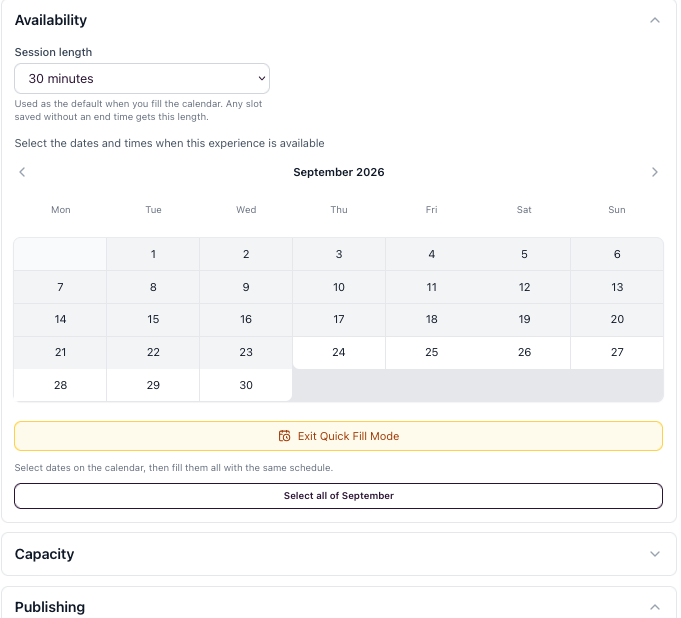
Set the session length of your lesson and then select "Quick Fill Mode" in order to start adding your availability. You will then see this screen.
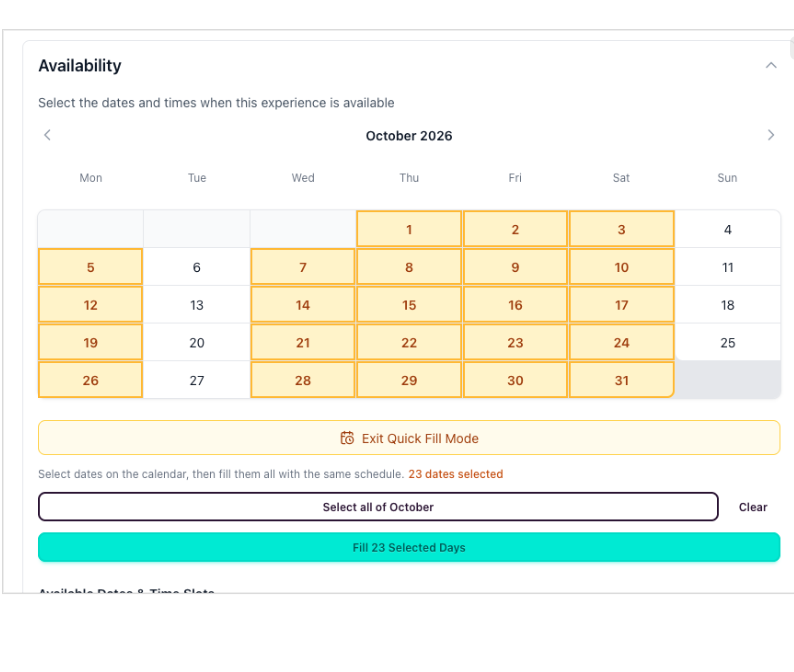
Yellow boxes on the calendar show your selected days. You will then click "Fill Selected Days" to add your availability for each of these dates. The same schedule will be applied to each day, so you will need to use Quick Fill multiple times if you want to add different availability for different days.
Note: After selecting available times you are able to make edits so that you can remove time slots from a day if needed. See the image below.
Our Story in Pictures
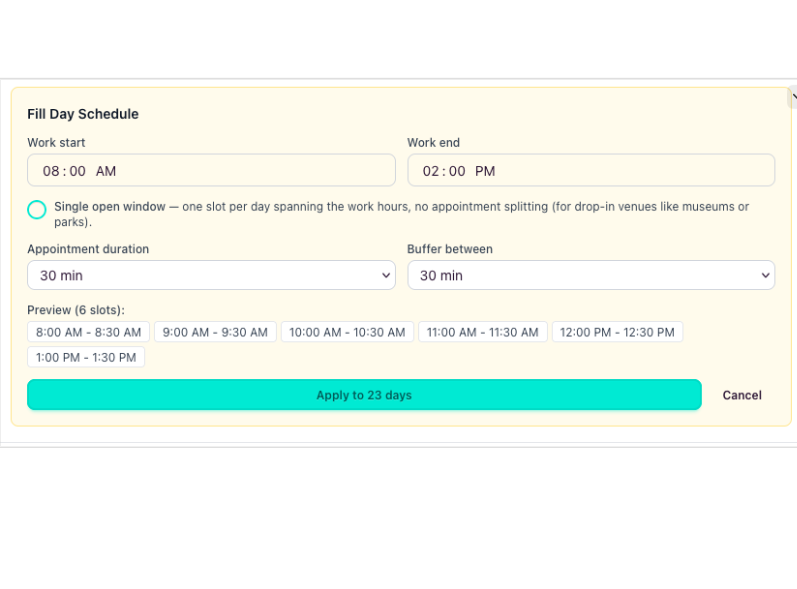
Choose the start and end times and select the buffer time that will be set between lessons automatically. You can select zero buffer between sessions if you wish.
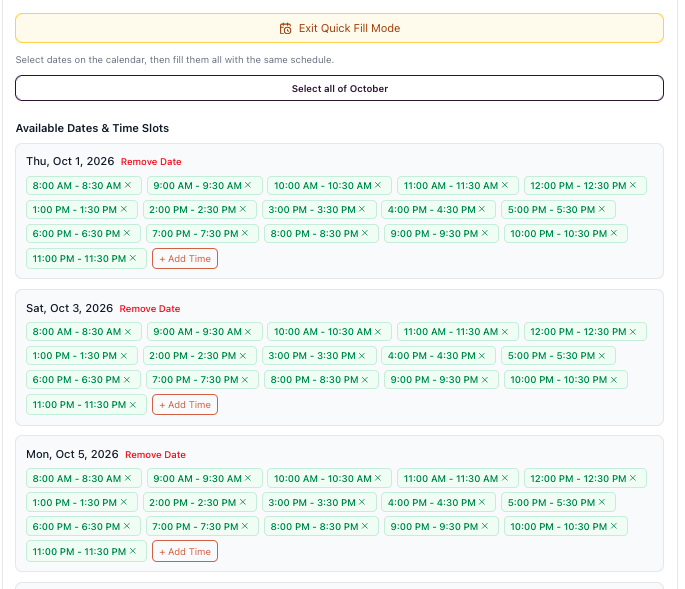
After pressing "Apply to Days" you will see all of the scheduled sessions. Here you can either add or remove times from each day or remove an entire day if needed.
If you need to change your availability in the future, you can always come back to edit your listing and edit these times in the same way.
Editing a Listing
Go to the "My Listings" page of your dashboard. You can click Edit on any of your active or draft listings. You can edit any detail of the listing including availability, description, photos, price, etc.
Please note that changing a listing price will only effect future listings and does not change the price of any already booked sessions.